Looking after your tyres is an important part of vehicle ownership and maintenance, and part of doing so is knowing how to change a wheel should you get a flat tyre.

Depending on the car you drive then your vehicle may or may not be supplied with a spare wheel. If it is not there should be an inflation kit that can be used to get a flat tyre inflated enough to travel to get it replaced.

We’ve put together this guide with step by step instructions on how to change a wheel to help drivers with a spare know what to do if they find themselves with a flat. We do recommend that if your new car is supplied with a spare tyre that you know how to change a wheel before the need to do so arises, so that you have a chance to change the wheel in a safe location without time pressures, poor weather, other traffic or any other stressors that can make the situation more difficult.

Equipment Needed to Change a Tyre

There are a number of items that you will need in order to be able to safely change your tyre, which include:

  • A spare wheel
  • A jack 
  • The locking nut key 
  • A wrench
  • The car’s handbook / manual 
  • Wheel chocks
  • Disposable gloves 
  • Safety equipment 

Spare Wheel

Your spare wheel should be regularly checked to ensure it has a legal tread depth, is in a good condition and the pressure is correct.

We recommend including your spare wheel when you check the rest of your tyres to ensure they are in a safe, legal condition.

Jack

If your car is supplied with a spare wheel then it will usually also come with the jack and other tools necessary to change a wheel.

No matter how your new vehicle is funded, and whether it is a company-supplied vehicle or you privately own it, you should always check the jack and other tools are in the vehicle and operational, and that you know how to work them in case you ever need to.

Locking Nut Key

Most wheels will have a locking nut or bolt to ensure the wheel remains on the vehicle, only one of the nuts or bolts will be a locking one. If your car has a locking nut or bolt then it will also have a locking wheel nut key so you can undo it as well.

We recommend the locking nut key is always kept in the vehicle as without it you will be unable to remove a wheel without it. You’ll also need to provide it to your garage when your vehicle needs any work.

Wrench

To change a wheel you’ll also need a wrench or wheel brace to remove the other nut or bolts from the wheel as only one is a locking nut / bolt.

If your car has wheel bolts rather than nuts it may also come with an alignment tool to help you fit them.

Vehicle Manual

Some vehicles will provide you with instructions on how to change a wheel in the manual or handbook, as well as additional information on where to place the jack and other helpful tips for your specific model. It can be useful to consult this if it is your first time on changing the wheel for your vehicle or you’re unsure on a particular step.

Wheel Chocks

Wheel chocks are blocks that are put in front of, or behind depending on the angle, of the wheels to prevent the car from moving. This can help if you need to change a wheel on an incline, as you can put them in front of the other tyres to reduce the risk of the car moving.

These are not essential but could be useful so if you have the room or they’re supplied with the vehicle we recommend keeping them in the car.

Disposable Gloves

We recommend keeping a few pairs of disposable gloves in the car in case you ever need to do maintenance work unexpectedly or on the go as they stop you from getting dirt on your hands and then transferring this to your clothing and the car interior. They can be useful if you’re checking the oil, topping up the screen wash or even changing a tyre.

Safety Equipment

There are a few pieces of safety equipment that we recommend keeping in the vehicle at all times, though there is currently no legal requirement to do so in the UK. These include a warning triangle and hi-vis jacket that can be used if your vehicle breaks down or needs maintenance on the road / roadside to help other drivers spot you and reduce the hazard that your car presents to them.

How to Change a Wheel

Now that we’ve covered what you will need to change a wheel we’re going to walk you through the process step by step.

Step One

The first thing you will need to do is prepare the vehicle to change one of the wheels.

If you notice the vehicle has a flat tyre while parked in a safe location then this should be relatively simple, however we know this is not always the case. If you are driving you should try to pull off the road in a safe location and where you will not be vulnerable to oncoming traffic whilst changing the tyre.

You should then firmly apply the handbrake, turn off the engine and put your hazards on.  If the vehicle is obstructing the road at all then you should also put your warning triangle out to alert oncoming traffic of the hazard.

If the wheel that needs changing is on the driver’s side of the vehicle then this will be more dangerous to change as you are more likely to be in the road yourself, and if possible we would advise pulling entirely off the road to change this.

Please note you should never attempt to change a tyre on the hard shoulder of a motorway. Due to the volume and speed of traffic it is not safe to do so and the Highway Code states not to do so.

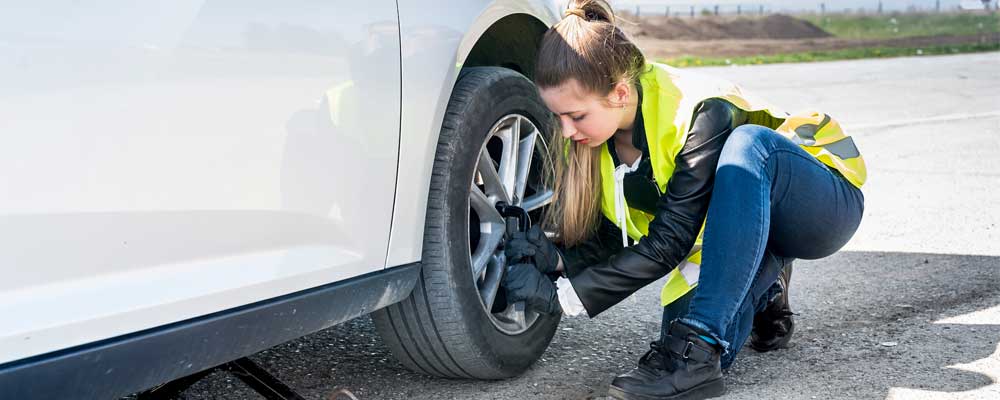
You and any passengers should then leave the vehicle, standing in a safe location, and wearing a hi-vis where possible. If you have any heavy cargo and it is safe to do so, then you might also want to remove this from the car to help reduce the weight you need to jack up.

Step Two

Next, you will want to get out all your required equipment and put it in a safe location where you can easily reach it when needed and it does not cause a further obstacle to any other road users.

Most vehicles will have the spare wheel, jack, wrench and other tools in a safe location under the boot liner.

If you have not already put a hi-vis jacket on then we recommend doing so at this point.

If you have wheel chocks and want to do them then you should place them now that you and the vehicle are prepared.

Position them behind the wheel that is diagonal to the flat tyre. For example, if you are changing the front right tyre then the block should be behind the rear left tyre.

Step Three

If you have a plastic wheel trim then you may need to remove this so that you can remove the wheel. It will become pretty clear if this is needed for your vehicle when you go to remove the tyre.

You’ll then need to loosen the nuts / bolts securing the wheel. First loosening the locking nut / bolt and then the remainder of them and only loosen them enough until you can turn them by hand rather than using the wrench.

We recommend loosening them but not fully removing them as the vehicle is still on the ground.

Step Four

Once the nuts / bolts are loosened you will then need to jack the car up before fully removing it.

You will need to place the jack at a safe point on the vehicle frame. Most modern cars will now have markers on their lower side showing where to place the jack for each wheel. There will sometimes be a simple indented triangle.

Otherwise, the vehicle handbook or manufacturer’s website can show you the correct location to place it.

When the jack is in the correct place you will need to raise it until the tyre is around 10 to 15 cm off the ground.

Step Five

Once the wheel is off the ground you will then need to remove the nuts / bolts from the wheel. You’ll want to put these in a safe but accessible location as you will need them to secure the spare wheel once it’s on.

Step Six

Then you can remove the wheel. To do this you should carefully slide it forward, which it should do fairly easily though if the wheel is stuck it might need a little more persuasion.

If you are not able to remove the wheel without too much force then it might be best to resecure the wheel and call for professional help as you do not want to damage the vehicle further by trying to force it off.

Step Seven

The next step is to place your spare wheel onto the vehicle. Depending on whether your wheels are secured with nuts or bolts you will need to slide it onto either the wheel nut slots or protruding hub bolts.

Once the wheel is in place you’ll then need to retrieve the nuts / bolts you put in a safe location and then tighten these by hand. Just as you did when taking the wheel off the vehicle you should only tighten these as much as you can by hand and not fully secure them.

Step Eight

You should then lower the jack until the wheel is resting on the ground, but not all the way down as the weight could cause the wheel to shift before you’ve fully secured it. You will then want to fully secure the wheel using the wrench and then the locking key on the locking nut to do so.

Step Nine

When you are confident that the nuts / bolts have been tightened as much as possible then you should lower the jack the rest of the way and remove it from your vehicle.

Step Ten

If you have a tyre pressure gage in your vehicle then you might want to check the pressure of the tyre now it is on the car. If not, you might want to stop at the next service station to check it is at the correct level.

Once you’ve completed these ten steps then you can place your tools, damaged wheel, warning triangle and any cargo you unloaded back into the vehicle and proceed with your journey.

It is important to note that it might not always be safe for you to change the tyre yourself. We’ve already mentioned above that it’s not safe to do so on the motorway but it might also not be safe to change the tyre on other busy roads, if you have to put yourself in an unsafe position on the road when changing the vehicle or any other situation that puts you or others in danger.

Replacing a Spare Tyre

We recommend taking your vehicle to a garage to have the damaged tyre replaced as soon as possible so that you are not using the spare for too long.

Many spare tyres have restrictions on the distance they can travel or a maximum speed you can safely drive with it on. You should check if your spare tyre has any restrictions and follow these.

FAQs

How To Tell If a Tyre Is Flat

There are a number of different telltale signs of a flat tyre.

The first is that it will look flat. This might not always be the case if it has a slow puncture, but if your car has been parked with a puncture for a few hours then you will be able to spot that it's running low on air. It will look noticeably different to your other tyres and won't be as firm when you press against it.

You'll also be able to notice a flat tyre with your steering. When one of your tyres is flat the steering will be unstable and you'll feel unusual vibrations throughout the car which will be most noticeable for you where you're touching it at the steering wheel. Additionally, you might feel like your steering wheel is pulling towards one side. 

Another sign of a flat tyre is that your suspension feels a little firmer than usual and the road a little bumpier.

Depending on how loud you have your music you may also notice an odd but regular noise which will be because the wheel is not fully inflated. There could also be a noticeable smell because of this as well.

Can I Change a Tyre at Home?

How Long Does It Take To Change a Tyre?

The length of time it takes to change a tyre can vary as it is dependent on a number of different factors and even something as simple as having a full boot that you need to empty before you can access your spare wheel can add an extra 10 minutes to the process. 

If you have not changed a tyre before then it is likely to take longer as you work out the jack placement and other details that can vary between model, which is why we recommend you always practice changing your tyre at home or in a safe location before you need it. 

In general, we expect changing a tyre to take around 30 to 45 minutes provided there are no complications. 

Can I Drive On a Flat Tyre?

We strongly recommend that if you have a flat tyre you do not drive on it. Driving on a flat tyre is dangerous as you do not have the same level of control over the vehicle and it will not have the same traction on the road. You are more likely to be involved in an accident if you drive on a flat tyre and will be at fault if you are involved in a collision. 

Additionally, driving on a flat tyre can cause further damage to the wheel itself leaving you with a more expensive repair bill as well as needing to replace the tyre. 

If you do need to drive on a flat tyre to get to a safe location should it run flat while you're driving then we advise going slowly and putting your hazards on to alert other road users. 

How To Avoid Getting a Flat Tyre

Sometimes a flat tyre is unavoidable but we all want to avoid getting one. 

There are a few things you can do to reduce the risk of you getting a puncture:

  • Avoid hazards in the road
  • Avoid hitting the tyre on the kerb
  • Regularly check your tyre pressure and add air as needed
  • Don't overload the vehicle 

One thing to consider is run-flat tyres. Although they do not prevent you from getting a puncture they are designed to still be usable afterwards for around 50 miles so that you can get to a safe location and change it. 

For more helpful guides on how to look after your vehicle head over to our driver guide section.

CONTACT THE TEAM TODAY

Contact Wessex Fleet